Everything you need to create, personalize and share your invitation.
Getting started
Your invitation, made simple
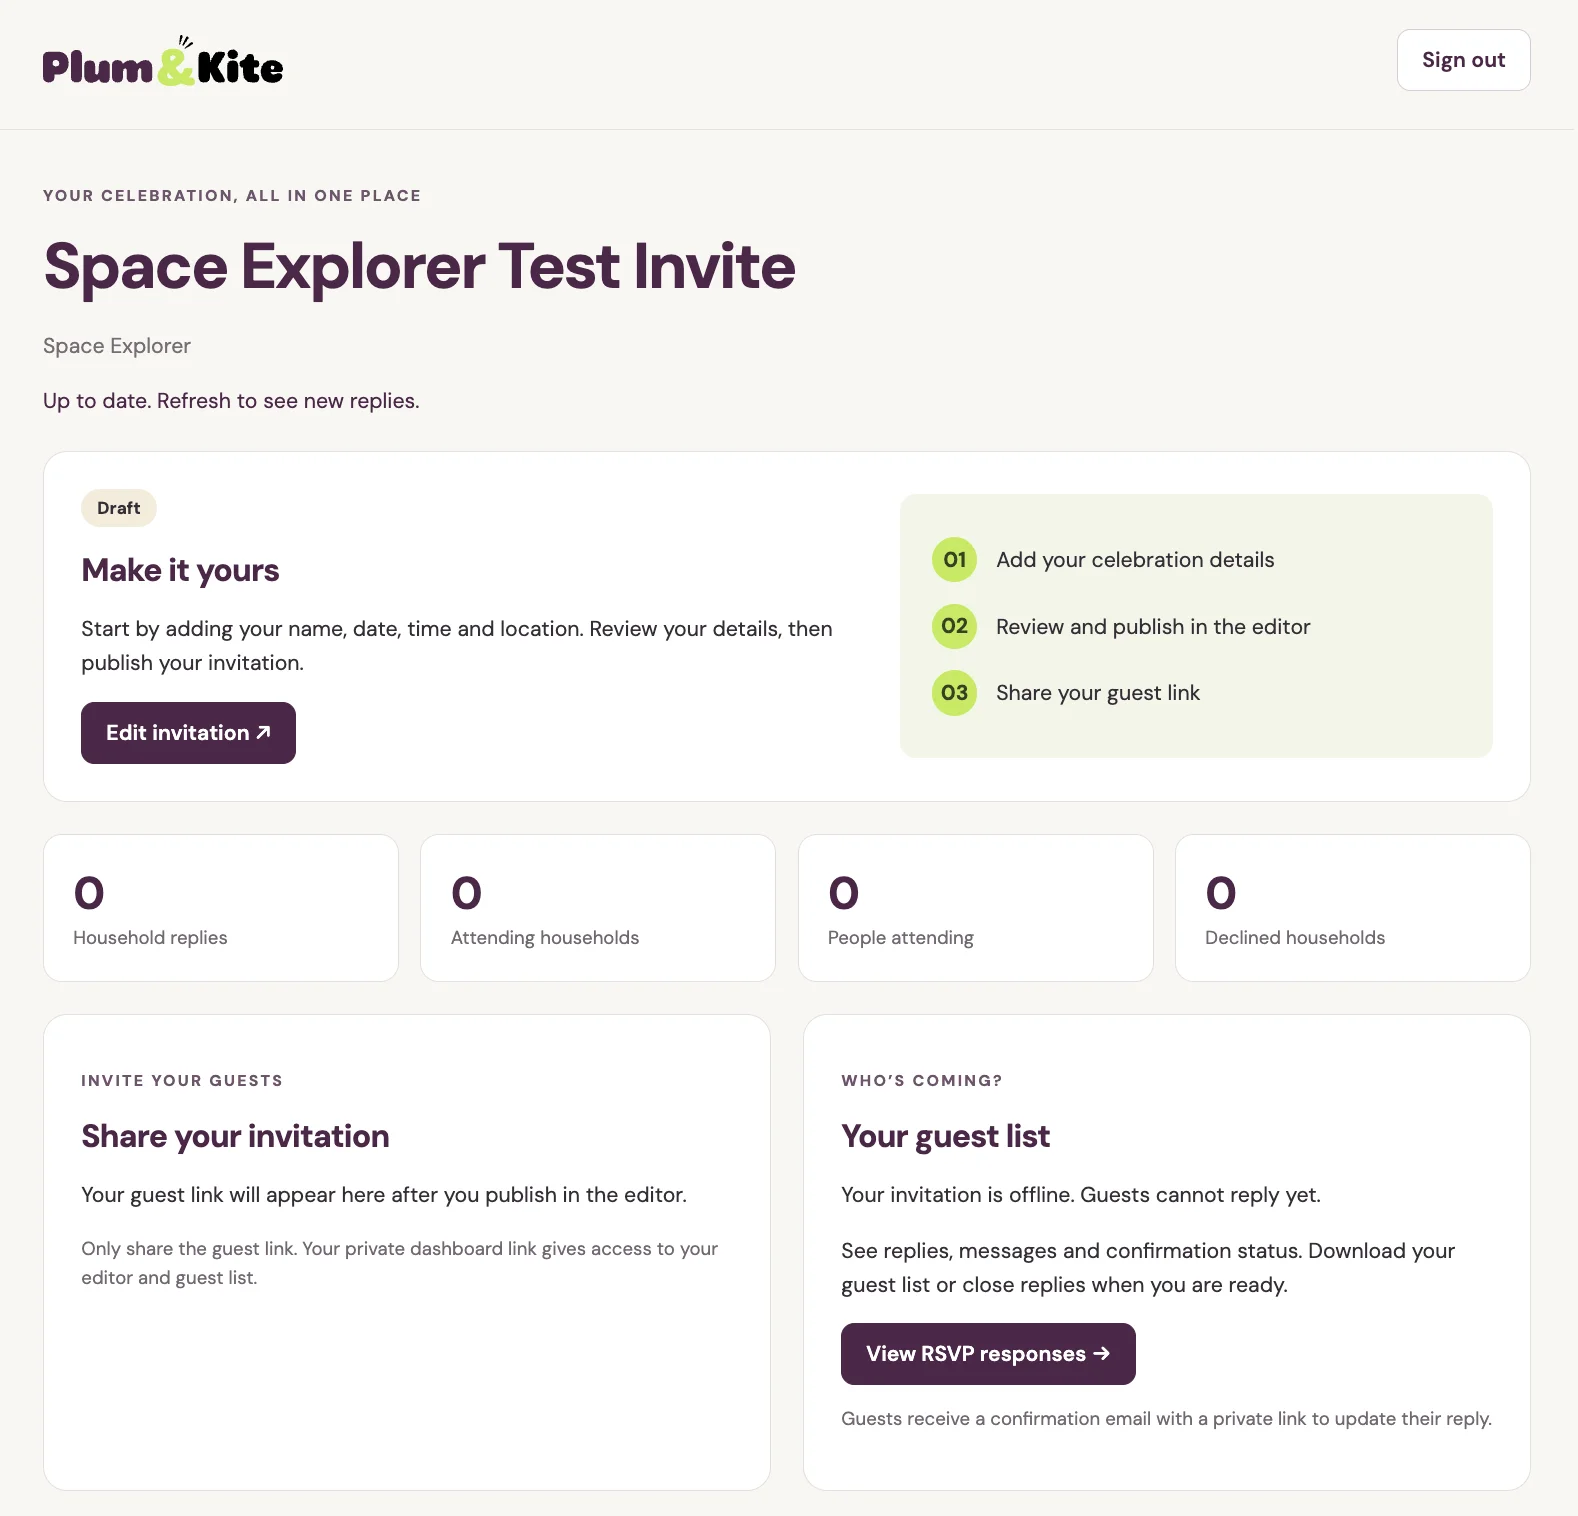
Personalize your invitation online, publish it and share a guest link with family and friends. You do not need to write any code.
Best device for managing your invitation
We recommend using a desktop computer or tablet to manage your private dashboard and customize your invitation in the editor. A larger screen makes it easier to review settings, adjust artwork and check the layout. Guests can view your published invitation and send their RSVP on a mobile phone.
Your private editing link
After purchase, you receive an email with a personal link to your private invitation dashboard. Keep this link private. It gives access to your invitation and editing tools.
Your private editing link
Your guest link
Once published, your invitation has a separate guest link that you can share with family and friends. Guests see the published invitation, not your editor or private dashboard. Saving a draft does not update the guest page until you publish again.
Basic or Advanced?
Start in Basic mode for everyday changes. Switch to Advanced when you want more control over artwork, positioning, animation and layout.
Quick start
Open your private invitation dashboard using the link from your purchase email.
Open the editor and choose Basic mode.
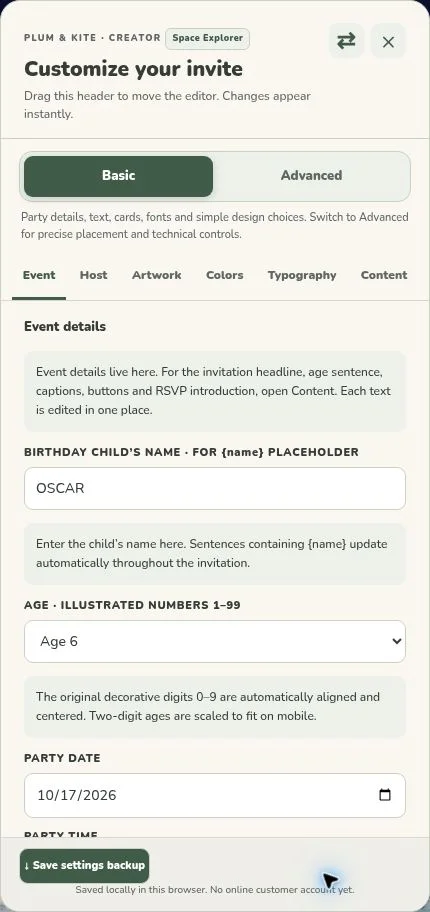
Enter the name, age, date, time and location in Event.
Add your contact details in Host.
Personalize the wording and artwork if you wish.
Save your changes, review the details and publish your invitation.
Open the guest link on desktop and mobile before sharing it.
Basic & Advanced Editor
Start with Basic
Basic shows the everyday editing controls. Use it to update party details, text, cards, fonts and simple design settings.
Explore Advanced
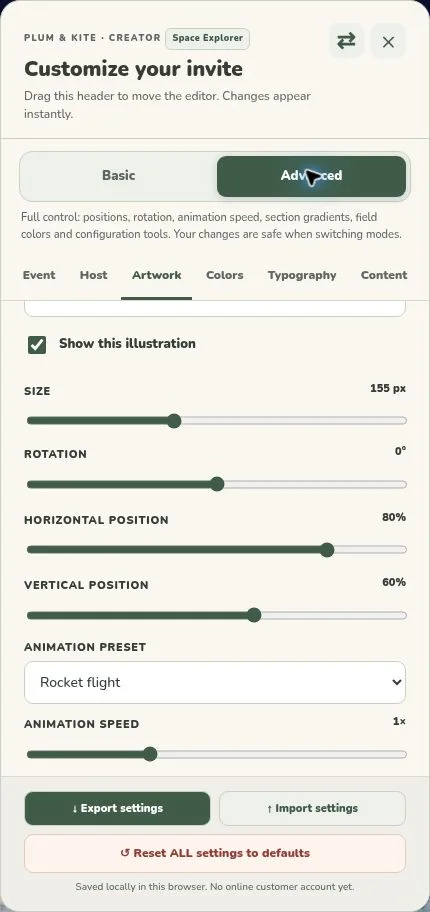
Advanced provides additional controls for illustration positions, rotation, animation speed, colors and settings files. Switching modes does not erase your changes.
The six editor tabs
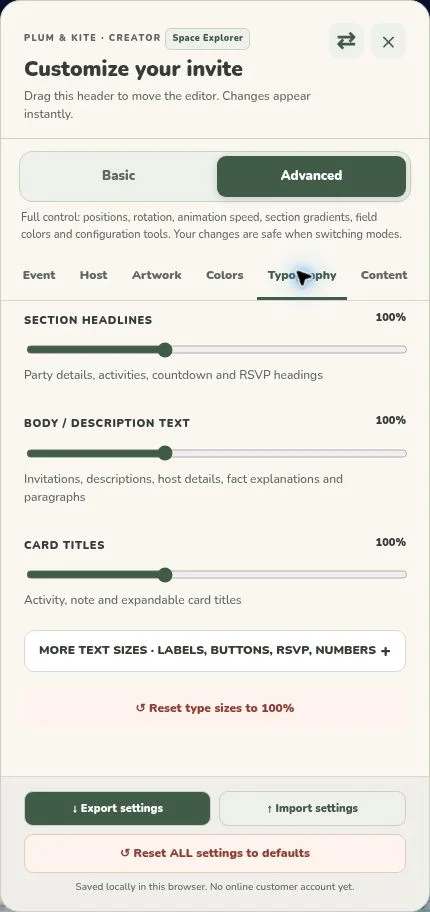
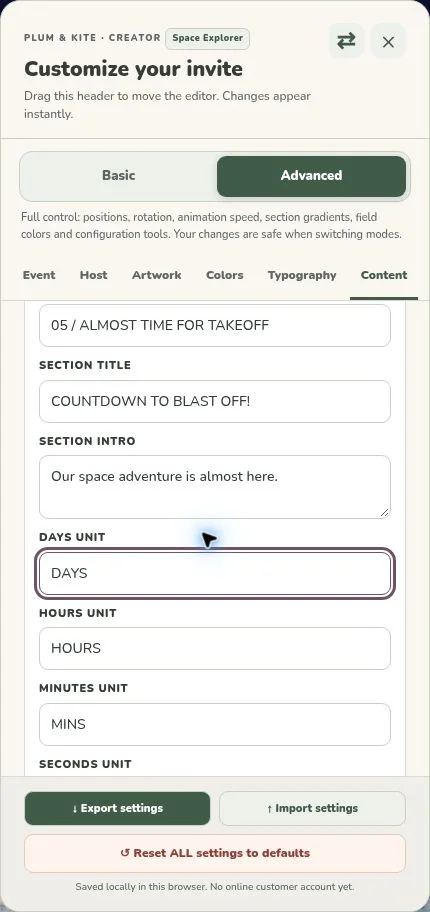
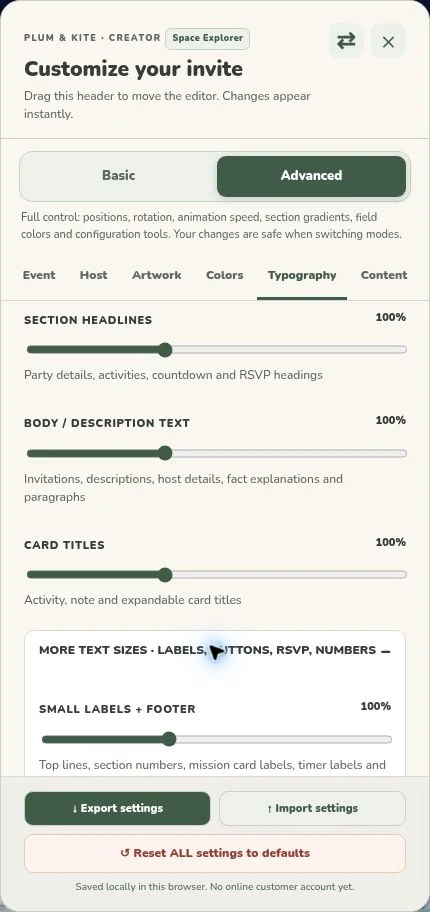
Event controls party details. Host controls contact information. Artwork controls illustrations and animations. Colors controls backgrounds and text colors. Typography controls fonts and sizes. Content controls wording and cards.
Move or close the editor
Drag the editor panel by its header to move it. Use the double-arrow button to switch sides. The X closes the panel without deleting your invitation.
Find additional settings
Scroll inside the editor panel and expand section headings to reveal more controls. Some settings are available only in Advanced.
Basic & Advanced Editor - editor screenshot 1
Event details
Name and age
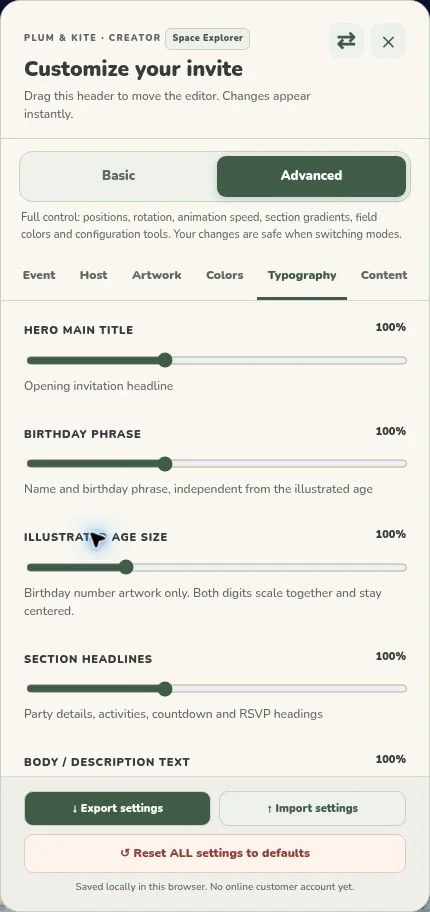
Enter the birthday child's name and age. The name updates text that uses {name}. For illustrated birthday numbers, use Typography to adjust their size.
Date, time and timezone
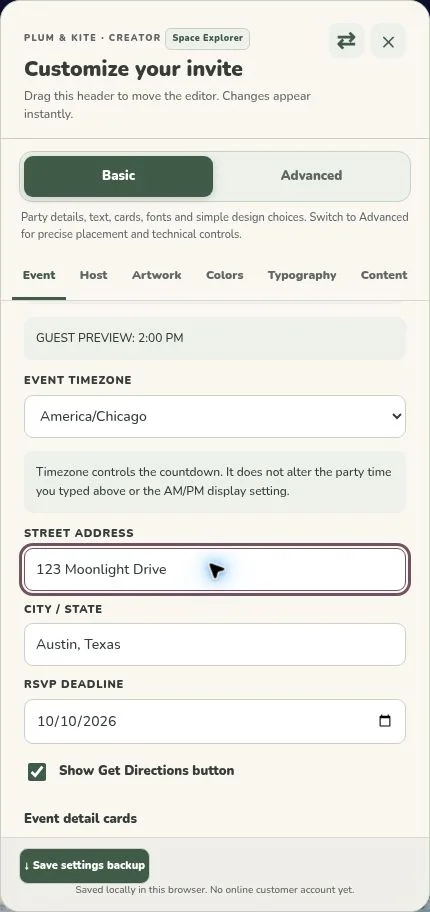
Choose the party date and local start time. Select the correct event timezone so the countdown matches your celebration.
Address and directions
Enter the full party address. Enable Get Directions if you want guests to open a map. Test the destination before sharing.
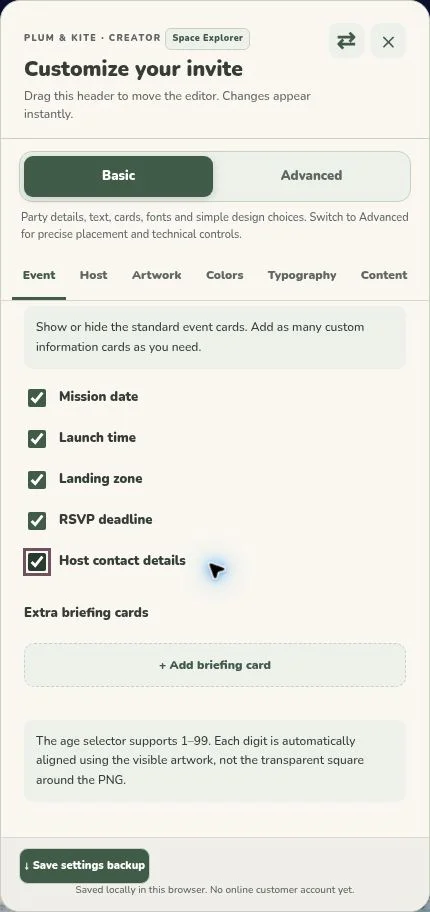
Event detail cards
Choose which event details to display. You can show or hide standard cards and add extra information such as parking.
Enter the name of the parent or host responsible for the celebration.
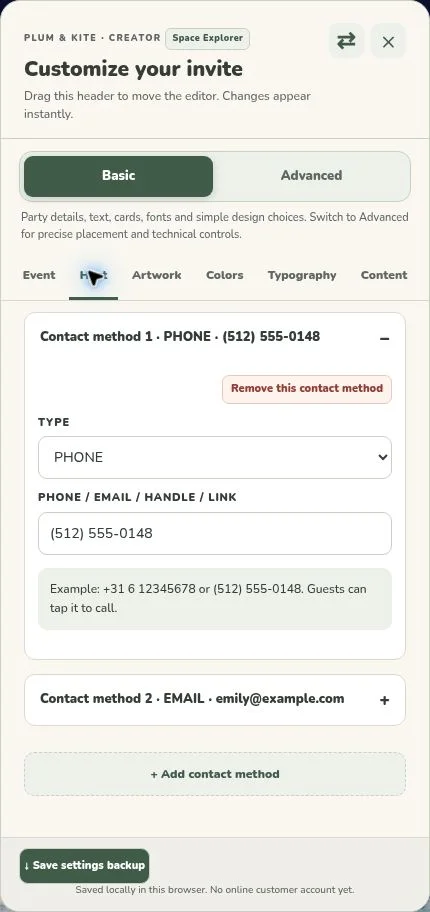
Contact methods
Add contact options such as phone, email, WhatsApp, Instagram or a website. Only include methods you want guests to use.
Test your contact links
Open the published guest invitation and check that contact buttons lead to the correct phone number, address or profile.
Host & contact details - editor screenshot 1
Artwork & animations
Choose an illustration
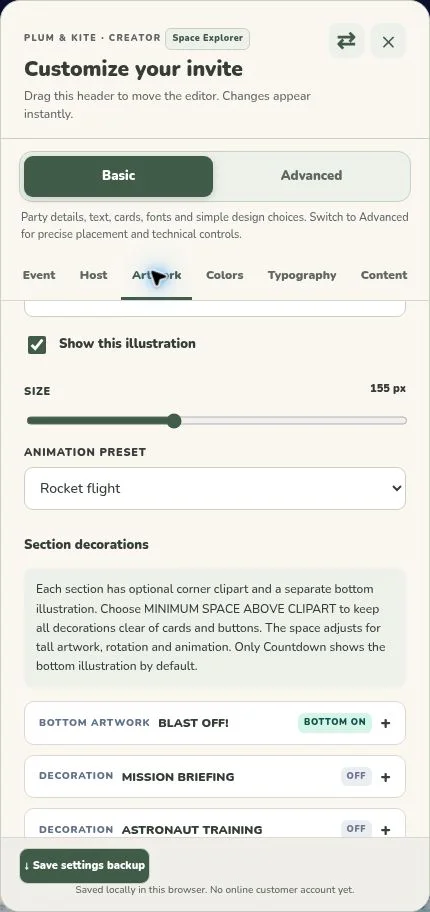
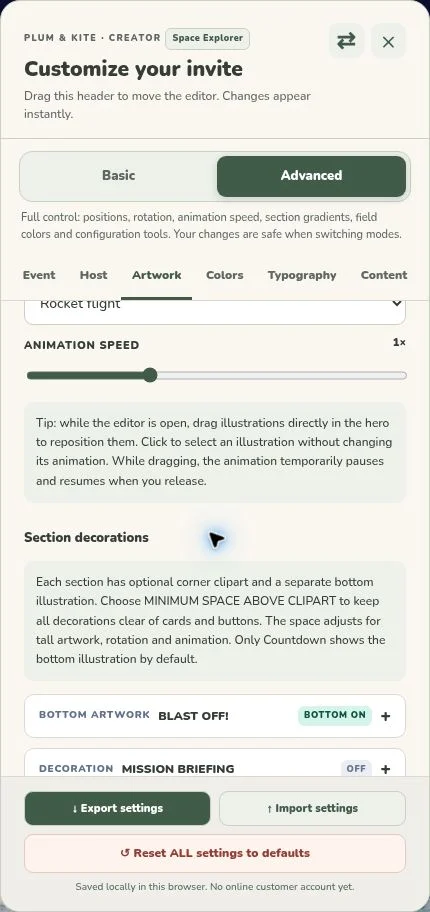
Open Artwork and select an illustration. Each invitation theme includes its own artwork. Use Show this illustration to display or hide it.
Adjust size and animation
Use Size to make an illustration larger or smaller. Choose an Animation Preset to control its movement. Select No animation if you prefer a still illustration.
Position illustrations in Advanced
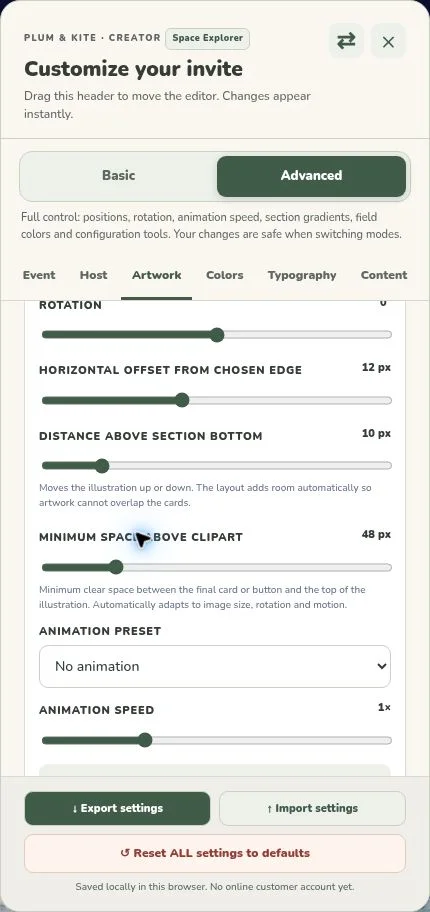
Advanced offers horizontal and vertical positioning, rotation and animation speed. Make small adjustments and check the result on desktop and mobile.
Decorate individual sections
Use Section decorations to add artwork to different parts of your invitation. Choose the illustration, its position and whether it should be mirrored.
Adjust spacing around decorations
Advanced settings let you change illustration size, offset and distance from the section bottom. Use Minimum space above clipart to prevent artwork from crowding cards or buttons.
Check the mobile layout
Some invitation sections extend beyond one mobile screen. Guests can scroll to see the full invitation. After adjusting illustrations or spacing, preview the complete design on a phone.
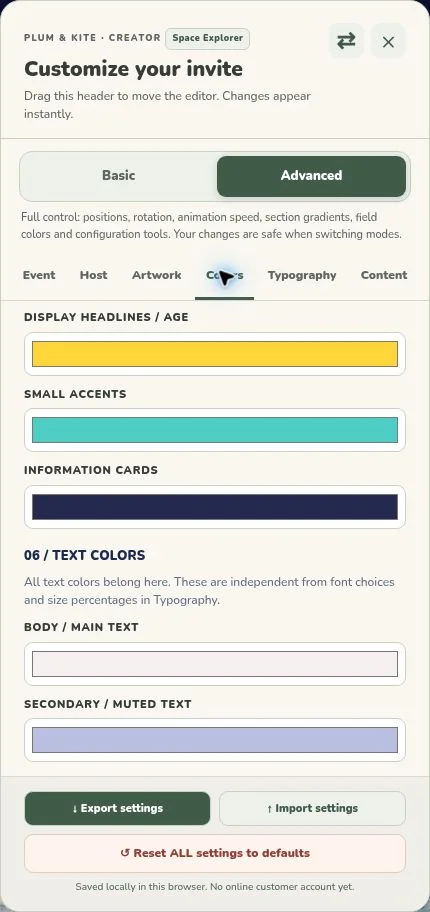
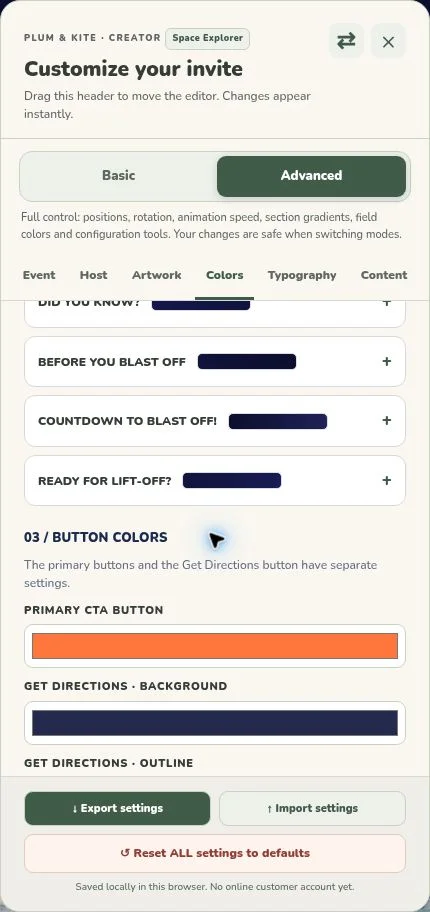
Open Colors to adjust the Hero background and individual section backgrounds. Use Top Color and Bottom Color to create a gradient. Choose the same color twice for a solid background.
Customize buttons and text
In Advanced, adjust button backgrounds, outlines and text colors. You can also change body text, card titles, descriptions and other text colors.
Keep everything readable
Check the contrast between text and backgrounds. Colors controls the interface colors, not the original colors inside the supplied illustrations.
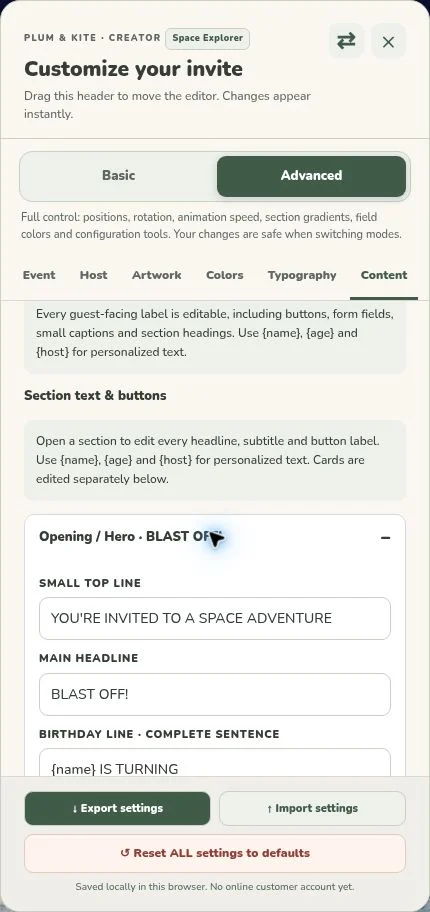
Open Content > Opening / Hero to change the main headline, introduction and birthday sentence. Use {name}, {age} and {host} where you want information from Event or Host to appear automatically.
Edit section headings and descriptions
Open the relevant Content group to update section titles, introductory text and button labels. Change actual dates, times and addresses in Event.
Customize your activity cards
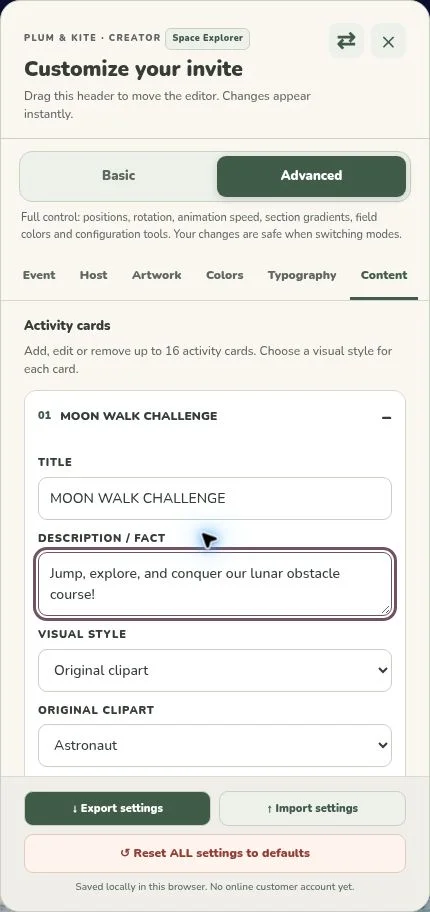
Open Activities or another card group. Select a card to change its title and description. Choose Original clipart, Emoji or No visual for the card's illustration style.
Add, move or duplicate cards
Use Add to create another card. Use the arrows to change its position, Duplicate to copy it or Remove to delete it. Each card group supports up to 16 cards.
Edit facts and practical information
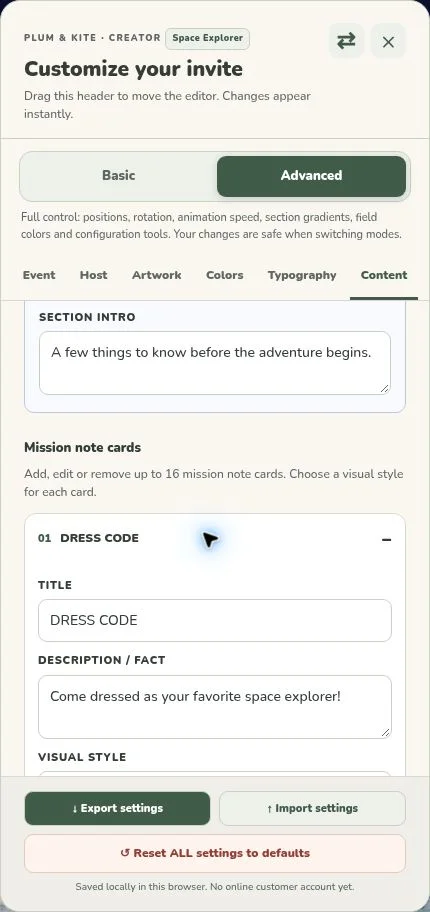
Use the expandable fact cards for interesting information or short questions and answers. Use practical notes for information such as parking, food, clothing or what guests should bring.
Reset a card group
Reset this card section restores the original cards in that group. It does not reset the entire invitation. Export a settings backup first if you want to preserve your changes.
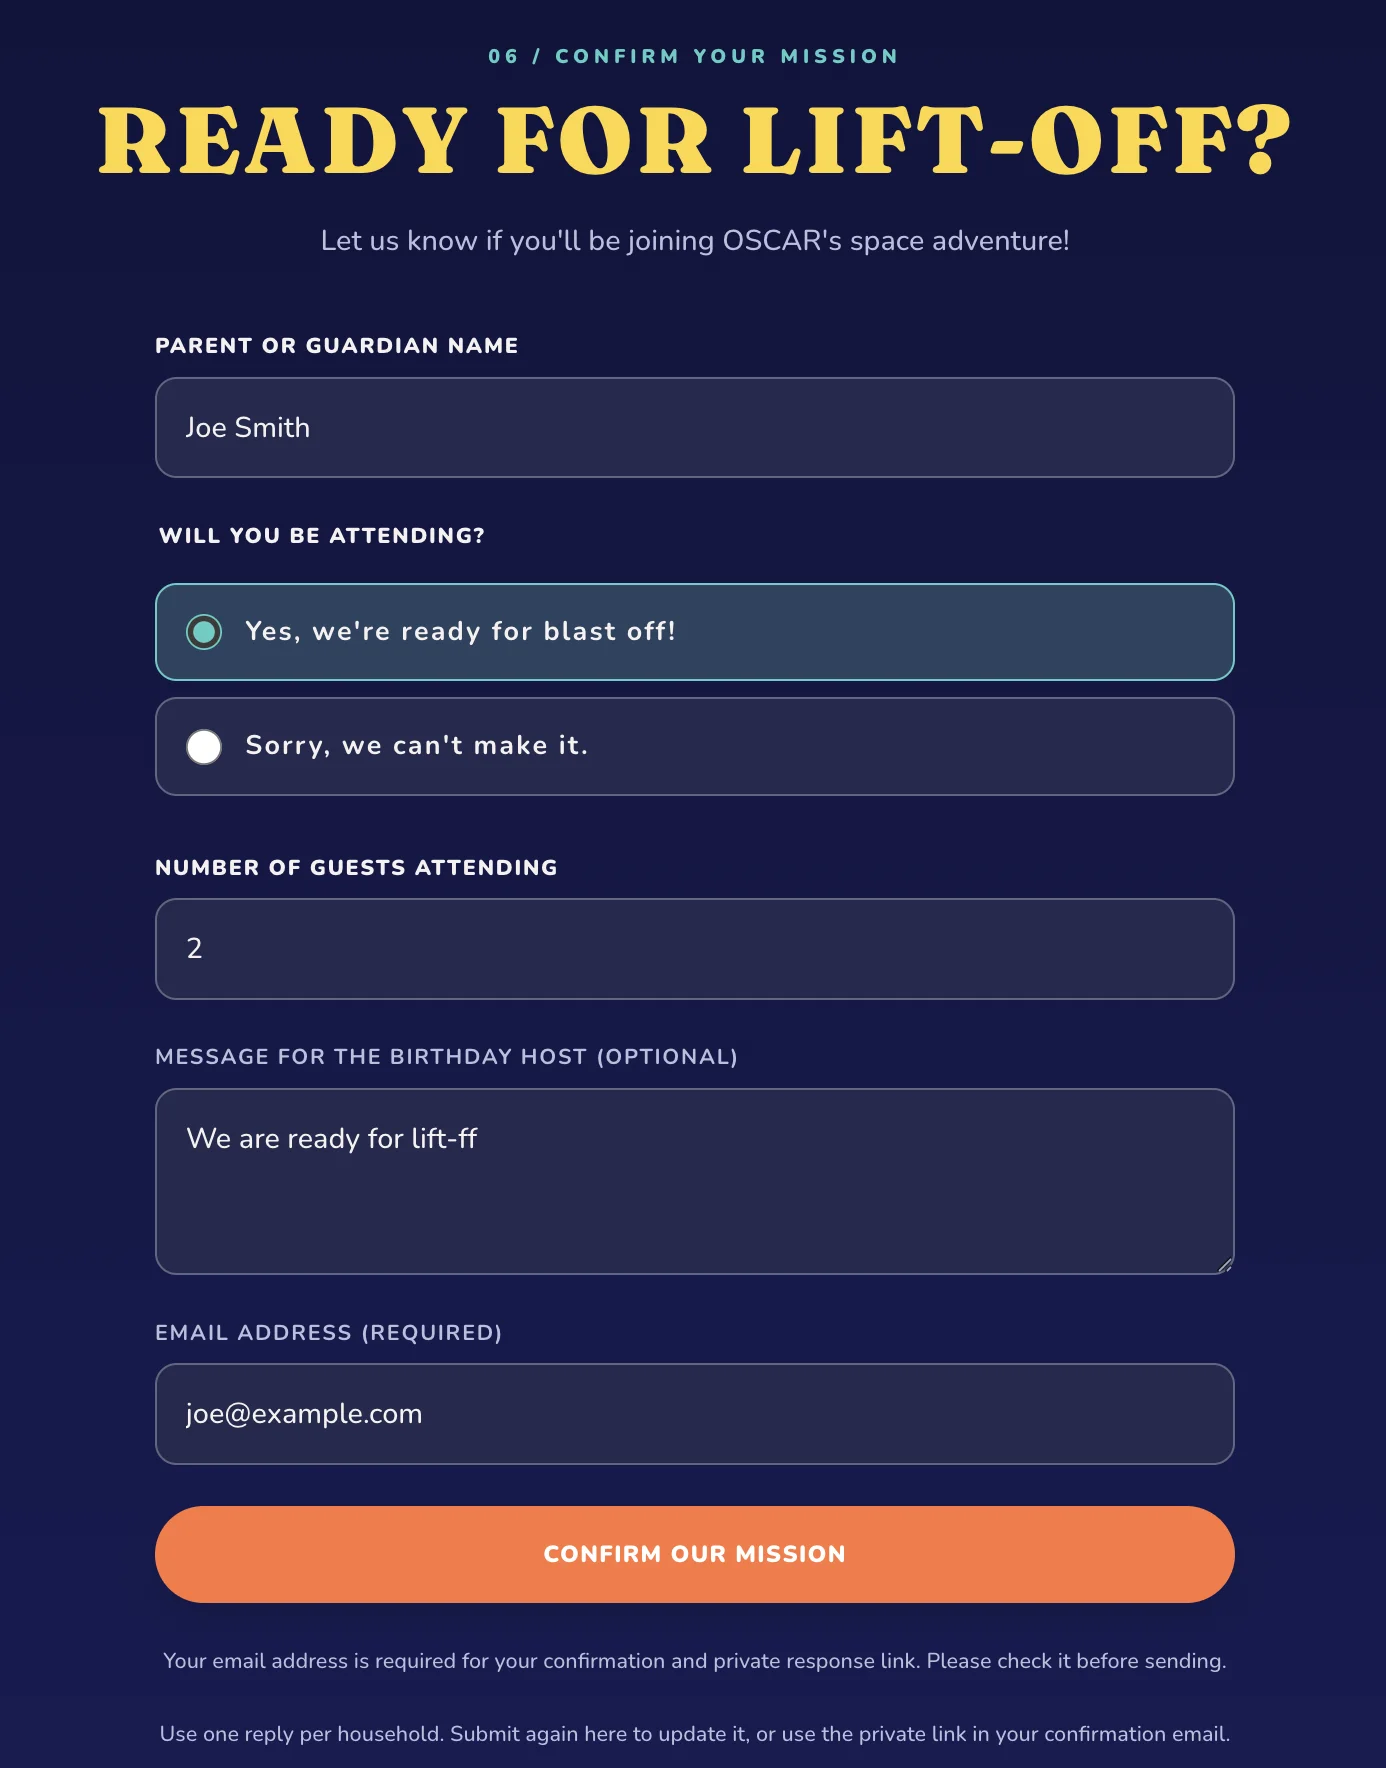
Guests open your published invitation and use the RSVP button to respond. They enter the parent or guardian name, choose whether they are attending, add the number of guests attending when applicable, and provide a required email address. They can also leave an optional message.
How guests RSVP
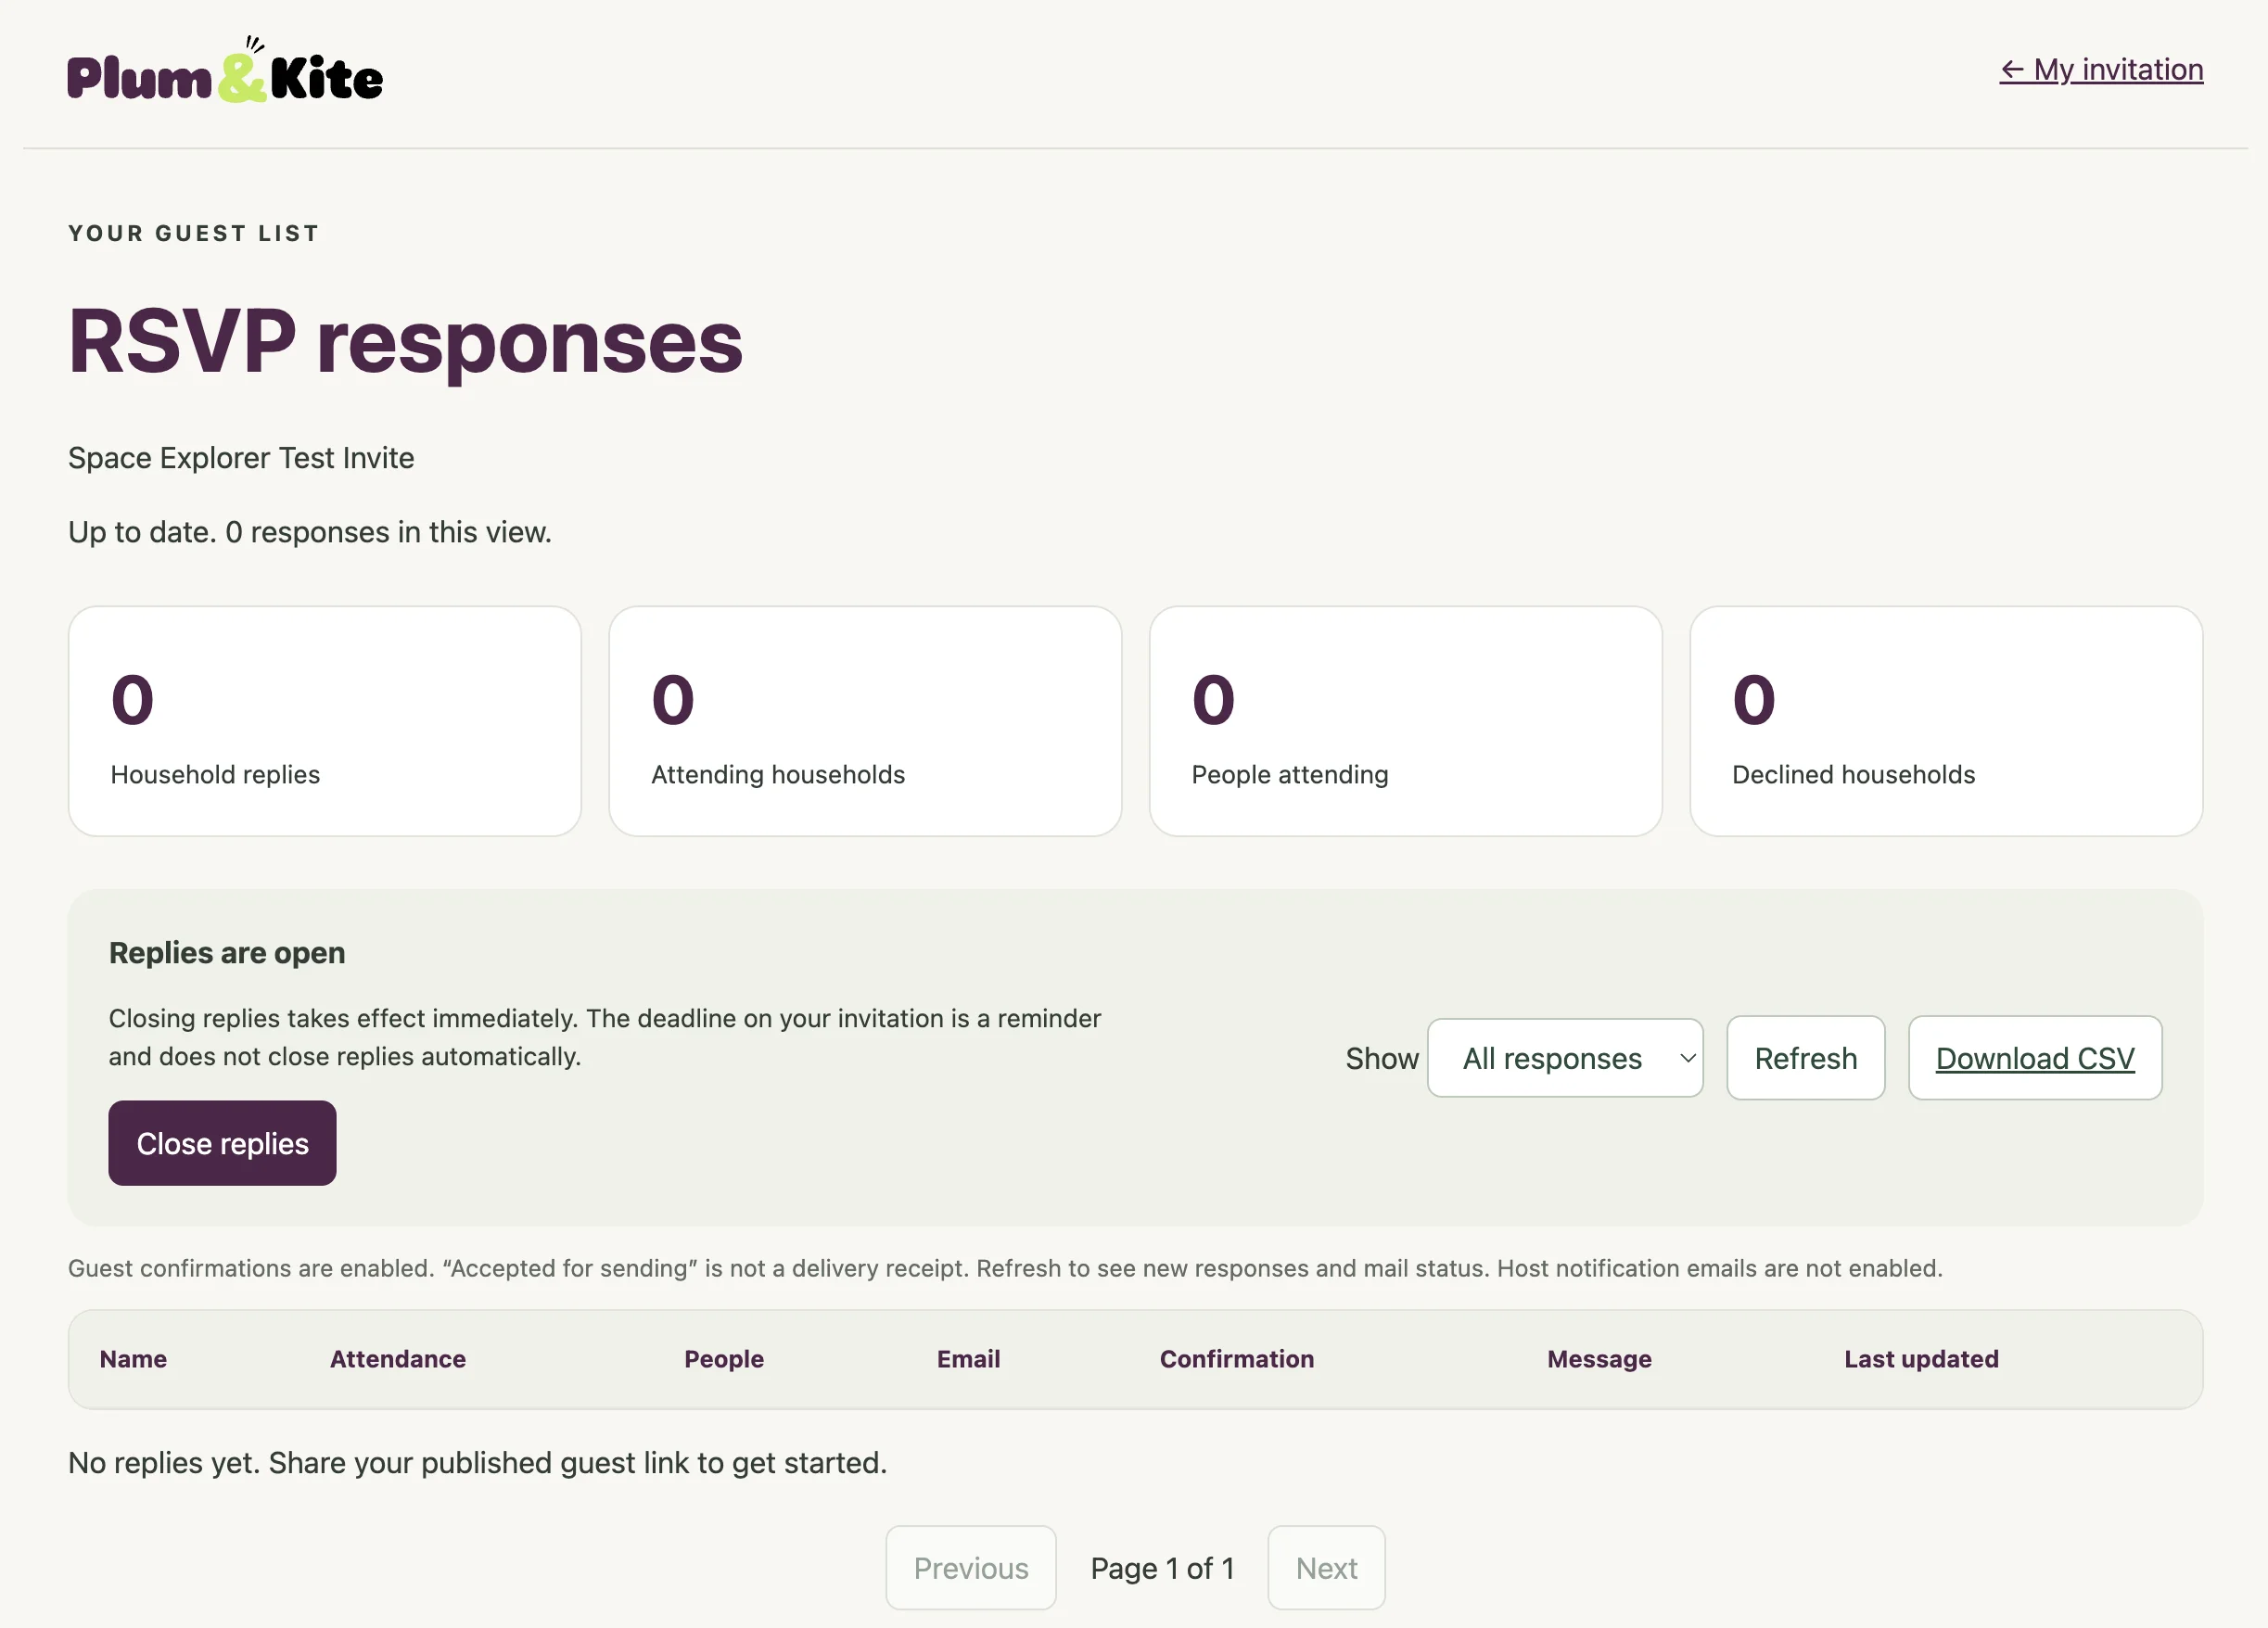
View guest responses
Open your private invitation dashboard to view and manage guest responses. Keep your dashboard link private and share only the guest invitation link.
View guest responses
Guests can update their response
Guests can change their response by using the private response link in their confirmation email. The RSVP form also explains how to update an existing household response. Check the latest response in your dashboard.
RSVP confirmation
After submitting a response with a valid email address, guests receive a confirmation email containing a private link to their response. Ask guests to keep this link private.
Customize RSVP wording
Open Content > RSVP & Form to adjust the RSVP heading, introduction, field labels, placeholders and button wording. These settings change the visible text, not the underlying RSVP behavior.
Check before sharing
Publish your invitation and test the guest link. Check that the RSVP button opens the form and that responses appear correctly in your dashboard.
Backup & restore
Download a settings backup
In Basic mode, choose Save settings backup. In Advanced mode, choose Export settings. This downloads a JSON file containing your invitation settings.
Import your saved settings
Choose Advanced > Import settings and select a backup from the same invitation theme. Importing replaces your current settings, so export a backup first.
Reset your invitation
Reset ALL settings to defaults restores the original theme settings. This includes party details, artwork, colors and cards. This action is not an Undo button.
Keep your backup private
Settings files may contain your address and contact details. Keep them private and never share them as your guest invitation.
Backup & restore - editor screenshot 1
Save, publish & share
Save your changes
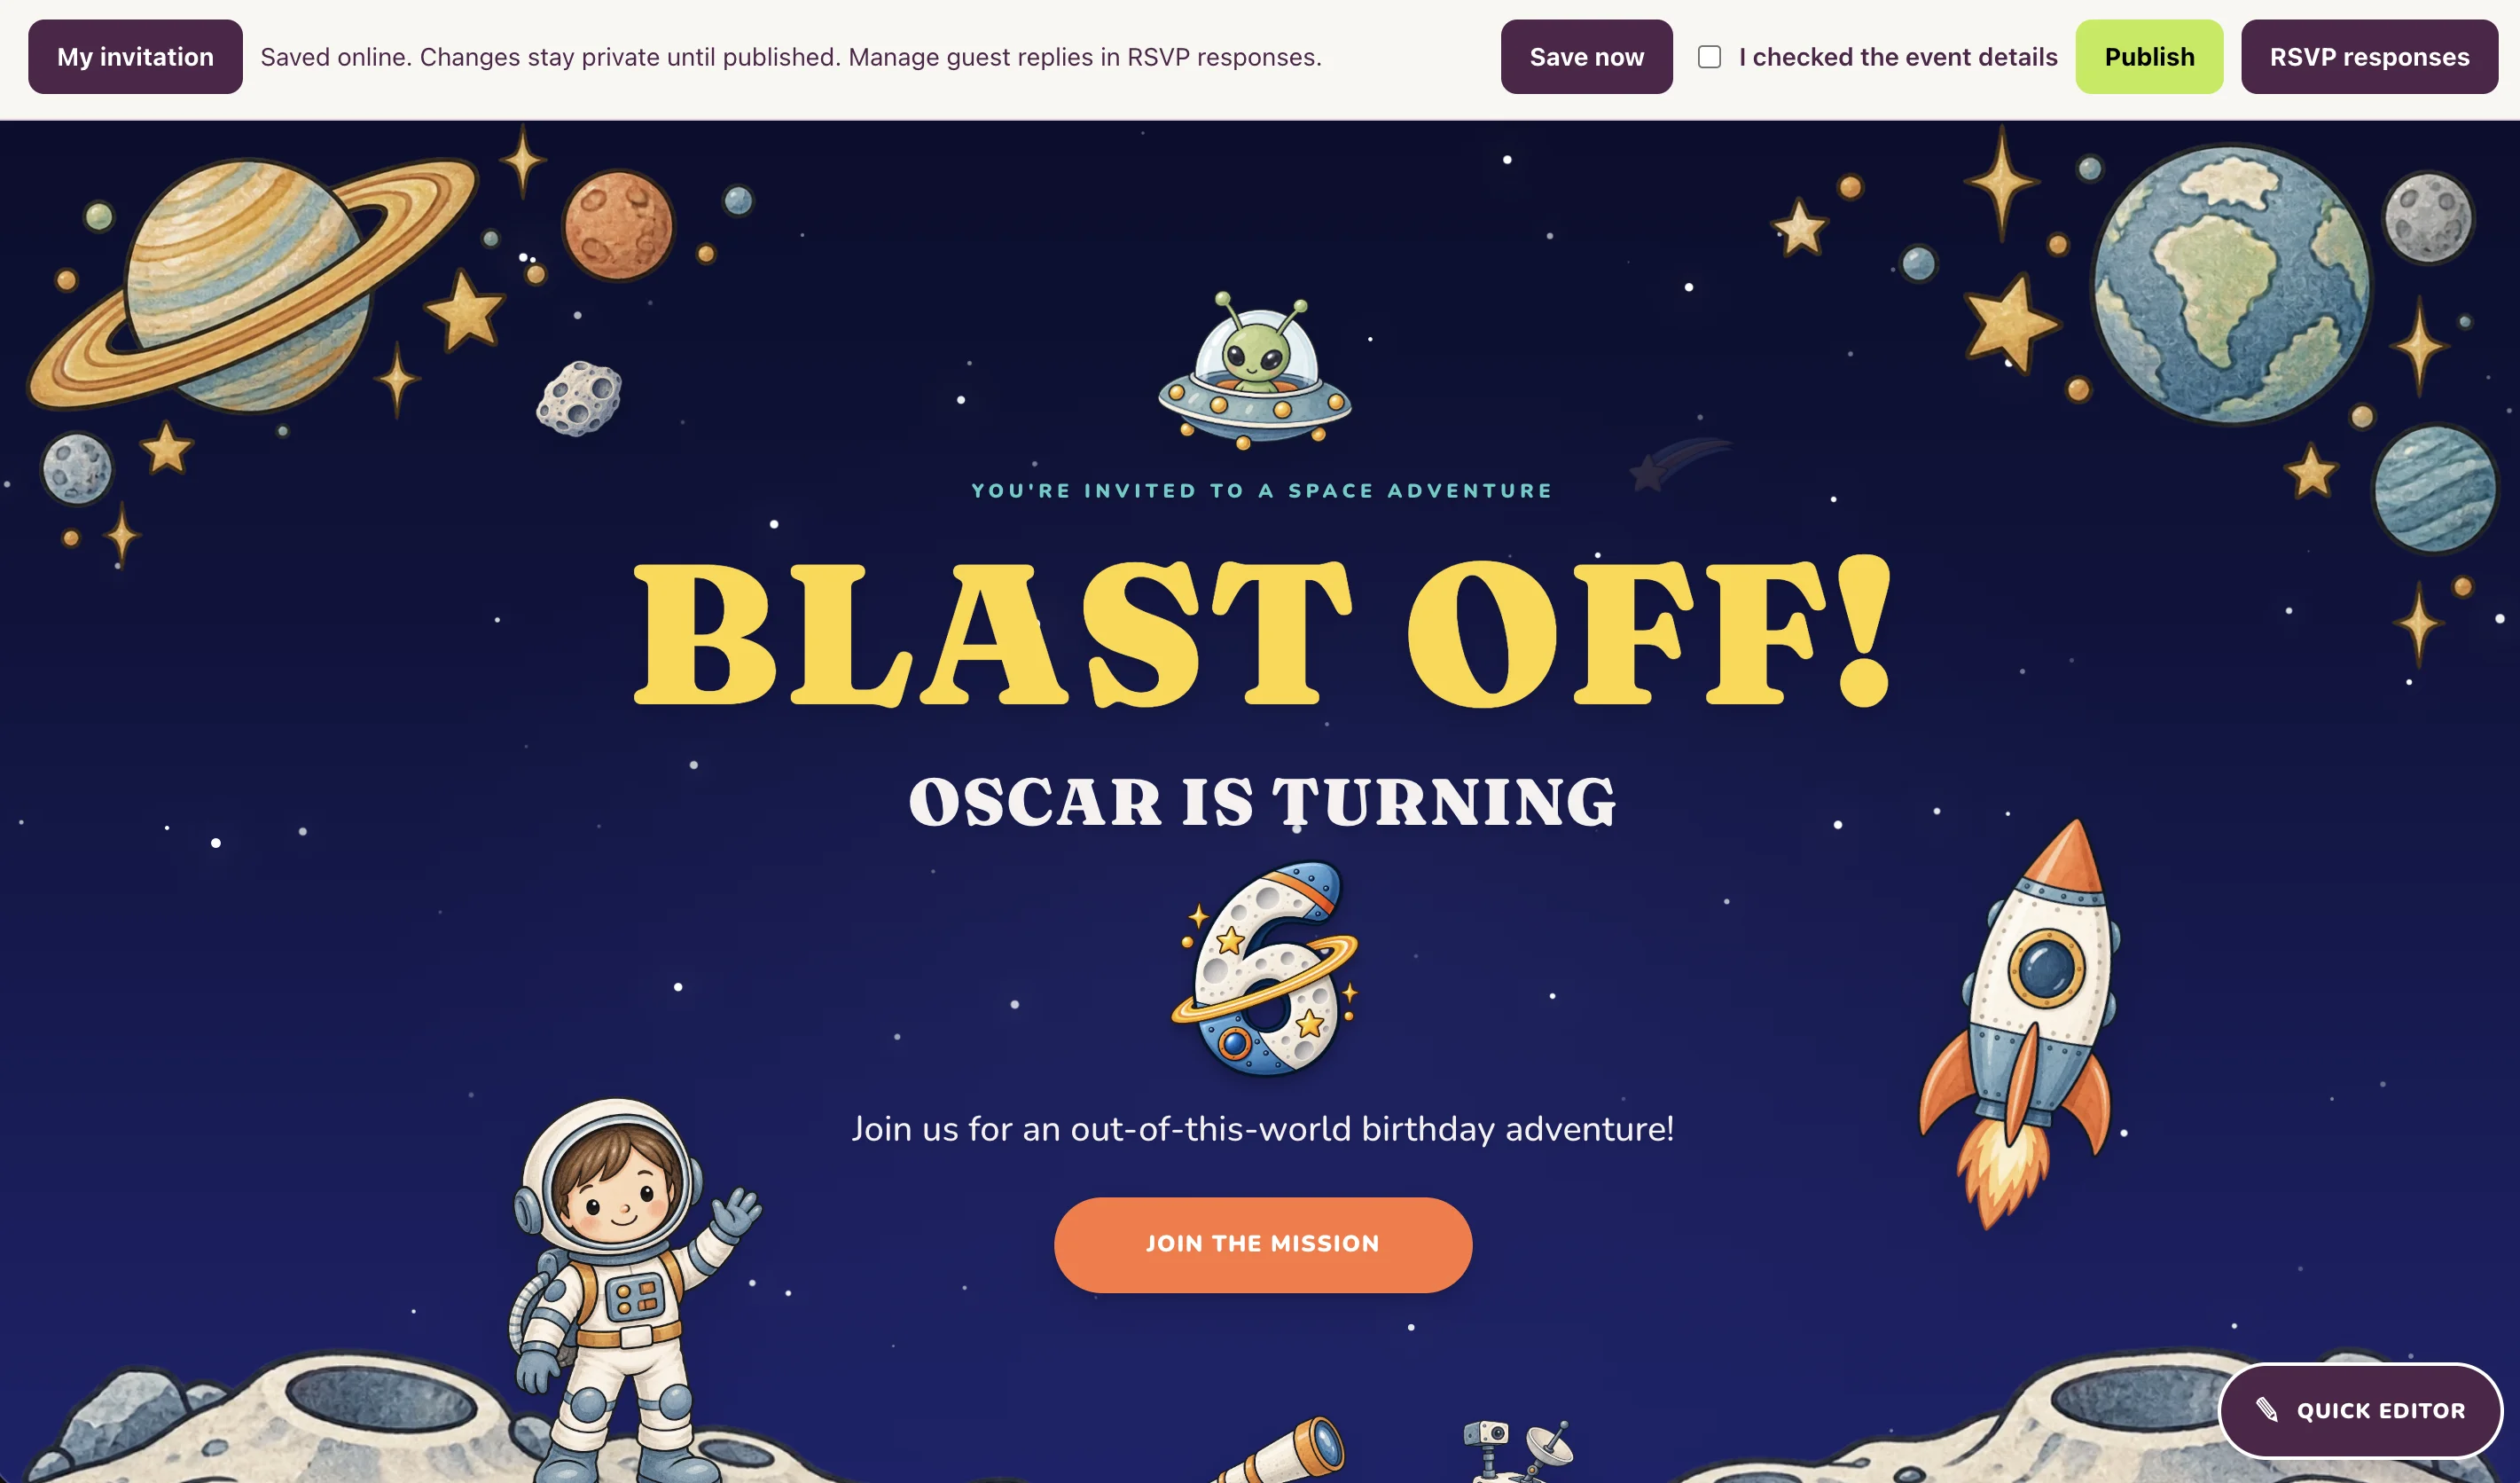
Your private online editor saves changes automatically. Wait for the Saved online confirmation before leaving the page. You can also select Save now. Saved changes remain private until you publish.
Save your changes
Publish your invitation
Review the event details, tick I checked the event details and click Publish. Wait for the Published confirmation.
Share the guest link
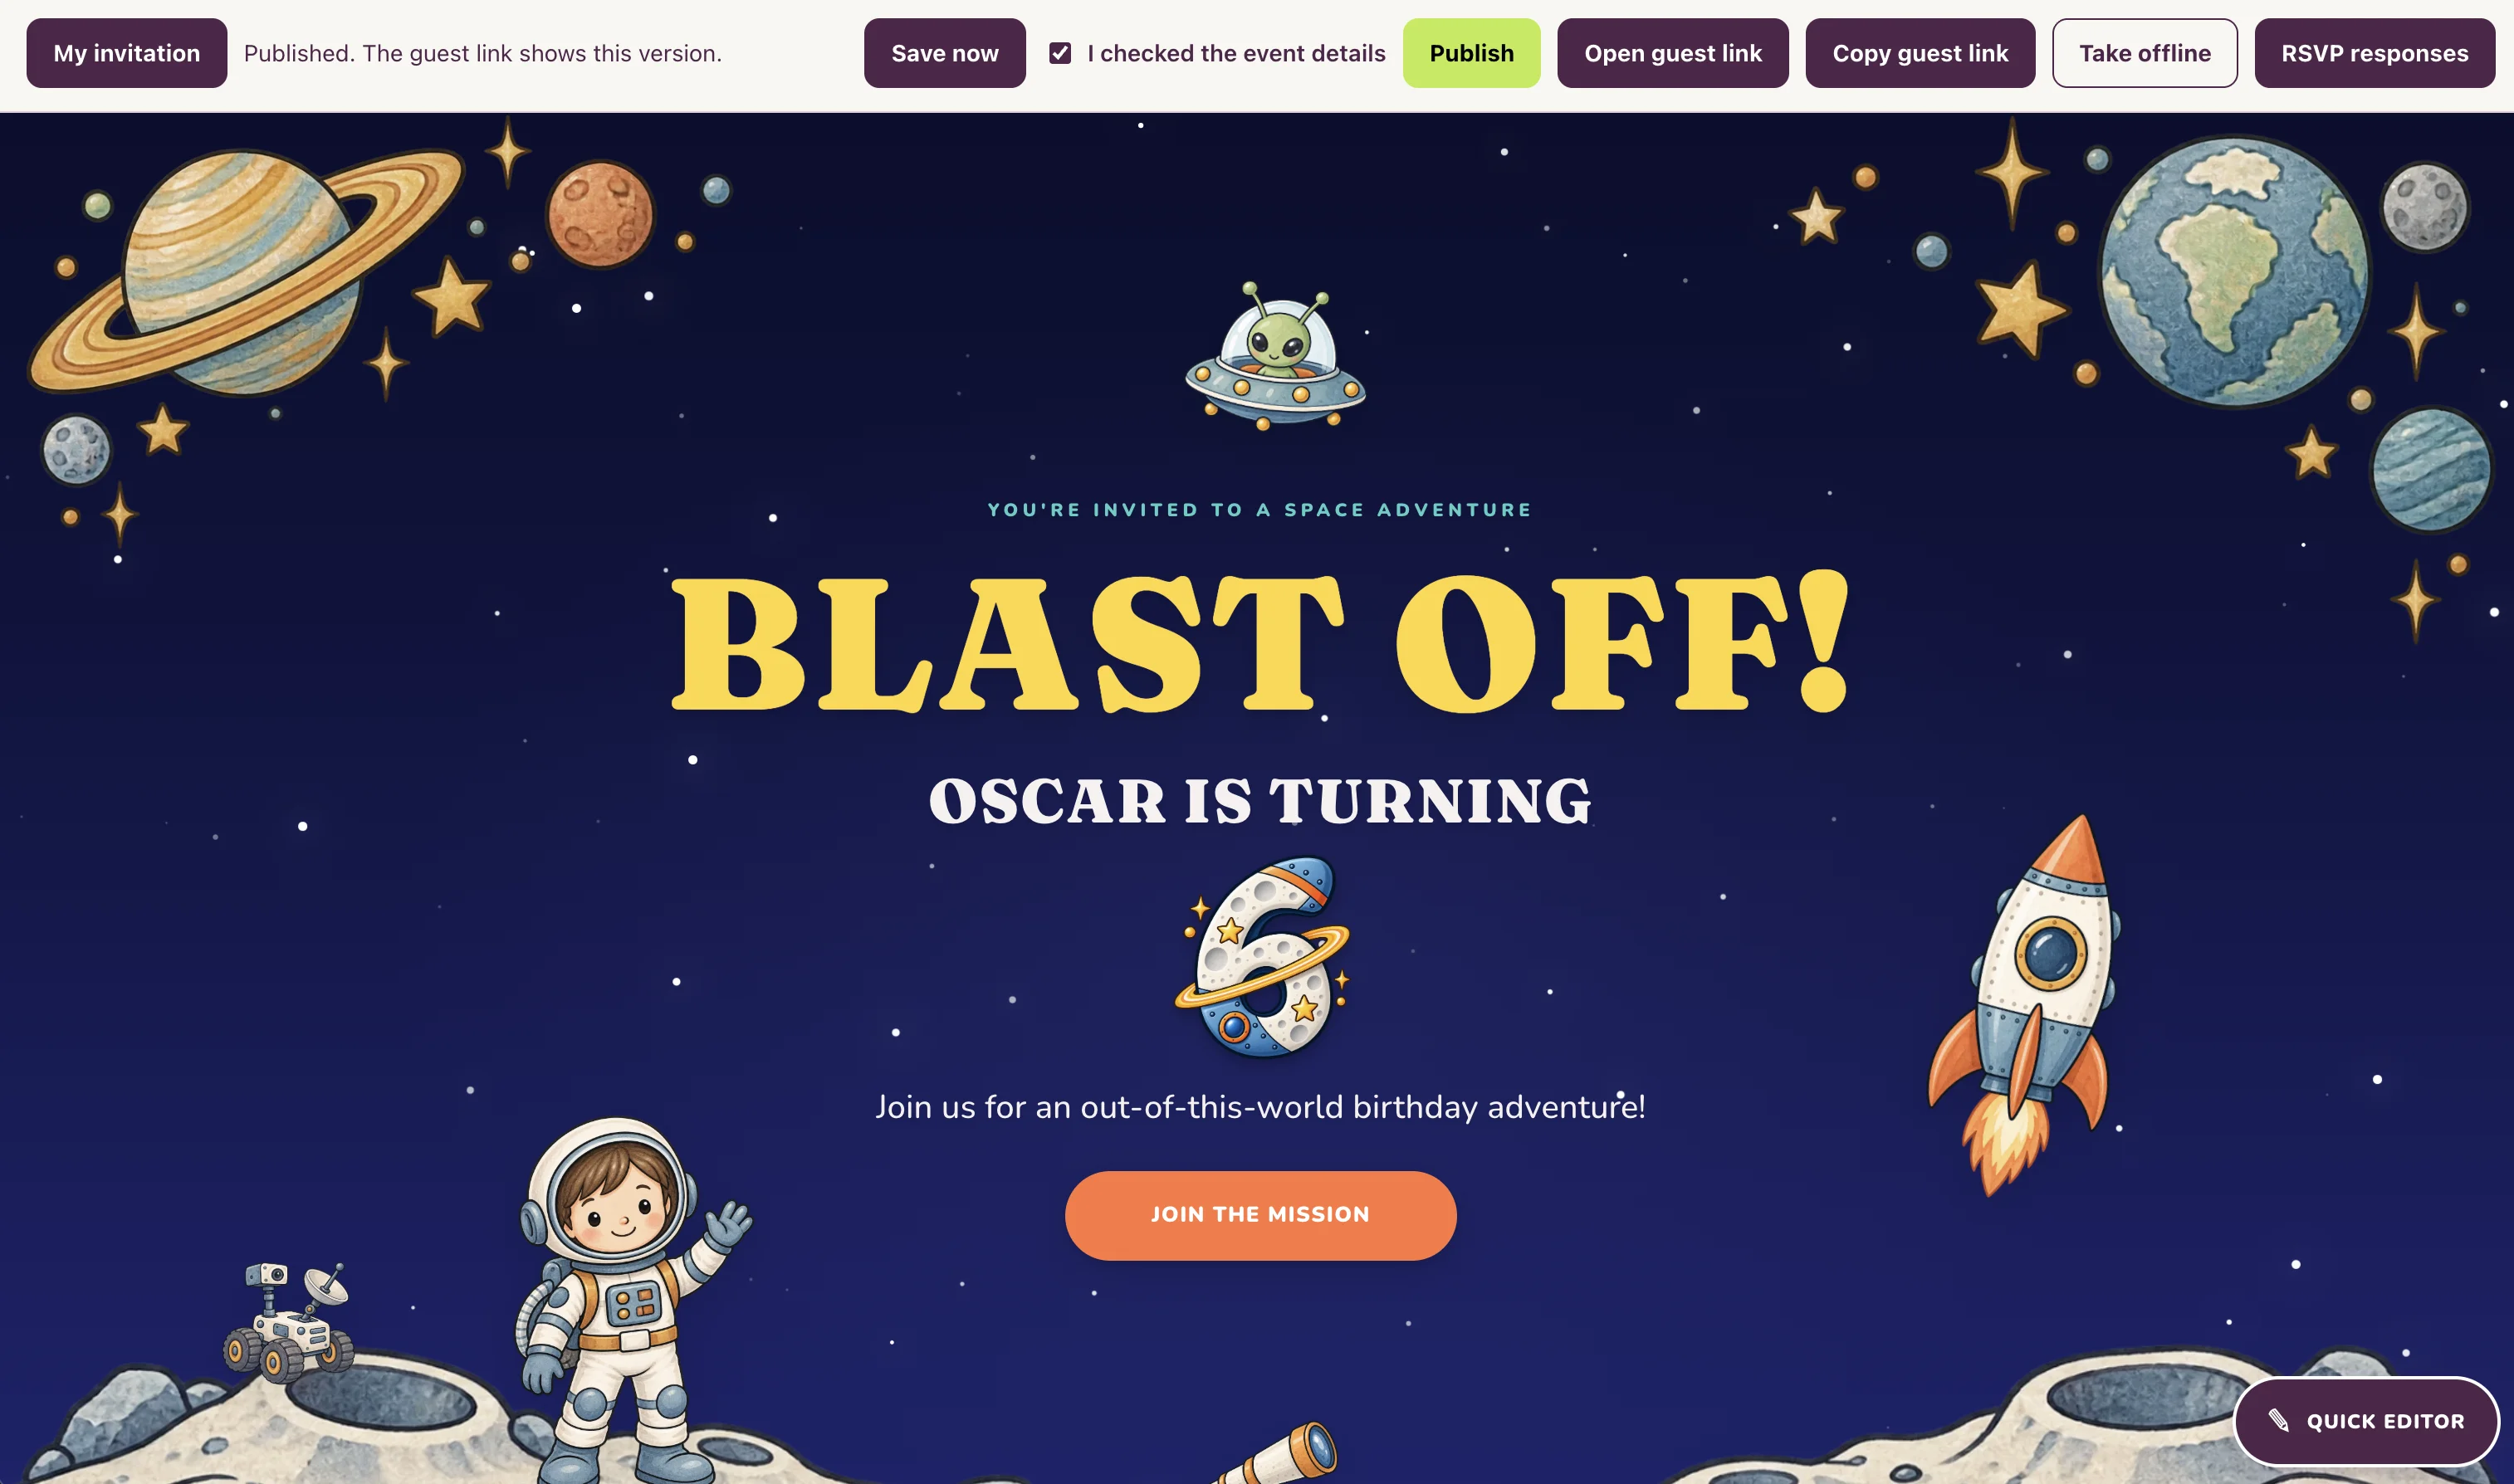
After publishing, select Open guest link to see exactly what your guests will see. Check the invitation and RSVP button on desktop and mobile. Use Copy guest link to share the invitation with family and friends. Never share your private dashboard or editing link.
Share the guest linkWhat your guests see when they open the shared invitation link
Make changes after sharing
Open your private dashboard, edit the invitation and publish again. Guests can see the updated version through the same guest link.
Take your invitation offline
Use Take offline to stop guests from viewing the invitation. Your saved draft remains available. Publish again when you want the guest page to be accessible.
Troubleshooting
I cannot find a setting
Switch to Advanced mode, scroll inside the editor panel and expand the relevant section. Some controls only appear for certain illustrations or card types.
My guests still see the old invitation
Check that your changes were saved online and published. Wait for the Published confirmation, then refresh the guest invitation.
The Publish button does not work
Check the editor status and confirm that you have ticked I checked the event details. After making another change, you may need to tick this box again.
Saving fails or my connection is lost
Keep the editor open. Restore your connection and try Save now. Do not assume your changes were saved until you see confirmation.
Artwork or text looks too large
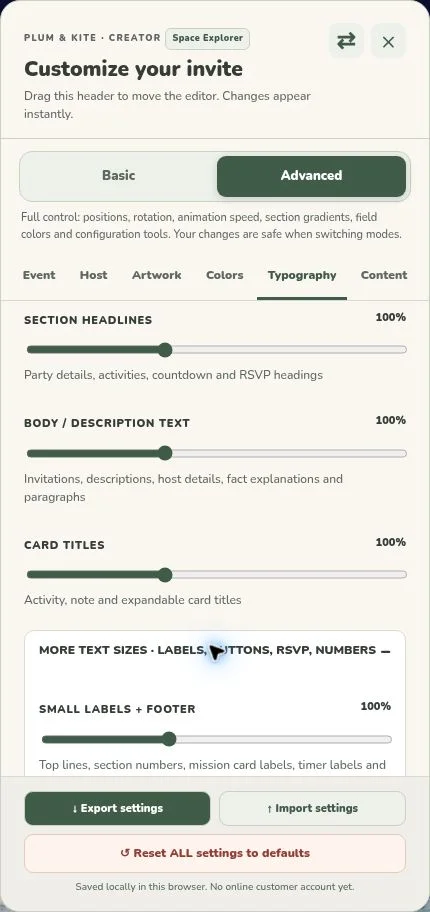
Use Artwork to adjust illustration sizes and Typography to change text sizes. Make small adjustments and check the result on mobile.
I need additional help
Note the exact error message and the editor tab you were using. Never share your private editing link publicly.
Final checklist
Check the name, age, date, time, timezone and location.
Check the RSVP deadline and host contact information.
Read every heading, description, card and button label.
Test directions and contact links.
Check the complete invitation on desktop and mobile.
Save your changes and publish the latest version.
Test the guest link in a private browser window.
Keep your private editing link and settings backup safe.
Share only the guest invitation link with your guests.
WE'RE HERE TO HELP
Still need help?
Couldn't find the answer in our guide? Tell us which invitation you're using and what you need help with.